About Me

My photo
Santa Clarita, Ca, United States
I work as a Technology Manager in the Entertainment Industry. My first film was Disney's Dinosaur and have been credited on several films since. I love working on old electronics, especially old radios. I am also passionate about technology and education. I have 4 kids and you can read about us on our family blog.

Monday, August 31, 2020

Magic Lantern Illumination

 If you are interested in running a Magic Lantern Show, figuring out how to illuminate your 1800's lantern can be a bit challenging.  In order to understand the best method for my own shows, I tried several experiments to find the best match. 


Classic Sources

To understand the problem it's worth reviewing how lanterns were illuminated in the 1800s and early 1900s.

Candles

Earliest lanterns and toy lanterns used candles. They aren't very bright so are only useful for small images in dark places. One "candlepower" is a mere 12.57 lumens. 

Kerosene

Single, Double, and Triple wick kerosene lanterns were often used with magic lanterns.  These produce quite a bit more light than a candle but still are rather limited. They also produce a lot of heat! 


Limelight

Limelight is produced by heating a piece of calcium oxide.  Although it produces a very bright light, it is dangerous, has legal restrictions, and is no longer practical for modern shows.

Carbon Arc

Carbon arc lighting is produced by creating a spark between two pieces of carbon. I remember building  my first carbon arc when I was 12 years old using an arc welder and the carbon rods from D Cell batteries.  There are still lanterns around with their original carbon arc lighting. Here is a carbon arc lamp at the State Theater in Oroville.


This is a loud, smokey, and complicated way to illuminate a lantern. Like the other classic lighting techniques, no longer practical for modern shows. 

Mazda Bulbs

When electricity became readily available, Edison Mazda lamps were popular to covert lanterns to use the new fangled electricity.  Many lanterns had their kerosene components removed and retrofitted to the new technology.  These often come in 300-400 watts.  Notice the compact filament and the classic "Edison Bulb" shape. 


Modern Sources

Incandescent Bulbs

Like their Edison Mazda lamp predecessor, modern incandescent bulbs are available.  These can run in the thousands of lumens.  Though not as hot as Kerosene, they can be very hot! On the upside, if you have a lantern converted to use a Mazda bulb, you can likely just screw in a modern replacement.  Your greatest challenge may be aligning the filament.  Since the condenser on the lantern expects a relatively small light area, you need to make sure the filament on your modern bulb is in roughly the same place as the original. 

Halogen projection bulbs

As film, slide, and movie projectors were commonplace in the 20th century there are a wide array to choose from in a multitude of voltages.  The beauty of these lamps are three fold.

  1. Efficient - They produce less heat than the Incandescent bulbs
  2. Sturdy - They do not require a heat sink.
  3. Compact - They are a "point light" that concentrates light in a small place, similar to the original illumination sources. 
Terry Borton from MagicLanternShows.com uses 250W halogen bulbs in his Biunial lantern for his shows.  Since I hope to operate "off grid" at Fort Tejon State Historic Park.  I created a lamp holder coupled with a UB1250 12 volt battery to use in this experiment. I used a rheostat to control brightness.  It's built with Oak, Mahogany and Brass and  is entirely self contained. 


It fits nicely in the back of the lantern and matches the original appearance. 


You can also get a 100-watt halogen bulb that you can mount in a standard light bulb base.   Thanks to Beth and Mark Ayers for this tip!  They mentioned that, "this worked nicely! Although we only performed in darken classroom sized venues so brightness was not an issue."


LED Arrays

LED illumination is quickly becoming the "go to" lighting source for magic lanterns. However, it comes with some complications. 

  • Heat Sensitivity - Unlike the other lighting sources, LED's require a heat sink. This adds extra bulk and weight to your lantern and may not fit in all lanterns. 
  • Power Supply - Although a single LED will run on an 18650 cell at 3.7 volts, LED arrays can vary from 12-30 volts.  This means adding a power supply to your configuration.  Some power supplies have fans that are noisy.
  • Density - To get the desired brightness, you will likely need an array of LED's.  The spacing on these LED's can vary.  Getting enough light in a small place can be challenging. 
  • Pattern - With an LED array you have several point sources.  This can create light and dark areas due to the configuration of the array. These can sometimes show up as a pattern in your image. 

Notice the difference in the density of the LED's between these two examples. The larger is a 35 watt garden light meant to run on 12 volts which sells for about $15. The smaller is a 50 watt "chip on board" (COB) LED meant to run at 30 volts which sells for about $10.  


For this experiment I picked up both 100 Watt and 50 Watt COB LED's from Ebay as well as the outdoor lighting. I mounted the COB chips on a piece of aluminum with thermally conductive grease on the back. 


 I tried it in the lantern but was not able to get as much light out as I expected. I found that my heat sink was insufficient so I ended up damaging the chip. More experimentation is needed. Fortunately, these chips can be had for less than $5. 

The CelSun Magic Lantern Lighting System

Thanks again to Mark and Beth Ayers for bringing this to my attention!  The Celsun Magic Lantern Lighting System uses a 100 wat COB LED chip and a remote power supply.   It has a sophisticated controller to control brightness and fade for Biunial or Triunial lanterns. 


Mark and Beth noted - "We acquired a lovely biunial lantern and implemented LED lighting purchased from Celsun. "


"Celsun lighting was built specifically for magic lantern projection. We purchased two separate types of controller. The simplest is a single light controller that only offers a control for light intensity. Later we purchased a three light controller that can be used in either Biunial or Triunial lanterns. This controller allows for fading from one slide to another. It controls fade speed and light intensity. It even has a lightening button that makes it possible to have momentary bright flashes to simulate lightening. We enjoy the flexibility and effects this new lighting provides.  Our only complaint is the noise the cooling fans in the controllers make. I imagine that the hissing of the hydrogen gas rushing into the limelight units the Biunial originally used was audible so with that rationalization we have grown to accept the fan noise."

From what I can see, the Celsun is a great "Plug and Play" system for someone who does not want to try building their own with  all the headaches and challenges involved with that approach.  The system can be purchased on their web site : http://www.celsun.com/shop.html

My Tests

To better understand how these different lighting sources would play out in different lanterns, I tried  several experiments. 

Test Lanterns

Experiments were run with the following lanterns.  Each has a Darlot F3.7 8.5 inch (216mm) Petzval lens. 


The McCallister on the left has been electrified and has a regular E26 socket. There is room for either an A21 or A23 sized bulb.  I found that the A23 aligned MUCH BETTER with the focusing condenser lens so much more light was available on screen. 

The wood lantern is open in the back so I used a light bulb socket or I used my 12 lamp holder shown above.  Since there was much more room, I could move the light bulb up and down to get the best alignment with the focusing condenser lens. 

Light Measurement

Two different values were noted. 
  • Lumens - This is total light output of the source.  Essentially a measurement of raw brightens of the illumination source.  These were all taken from the specifications of the device being tested.  No attempt was made to validate the manufacturers claims. 
  • Lux - This is what was measured at the screen which was 8 feet away from the lantern.  It is relative to the distance, lens, condenser, and configuration.  It tells you how much light makes it to the screen relative to the other sources in my specific test lanterns. 

The Test

I attached a light meter to wall and projected light directly on the meter.  I measured different levels of brightness for each illumination source. 


Focusing with a slide helps get the image focused. The slide was then removed for the test. Notice the "Hot Spot" on this particular halogen bulb test.


Results

My results are represented in the following table. Note that, since not all the lighting sources aligned perfectly with the condensing lens, the amount of light on the screen varied. Also note that since the McCallister has mirrored reflector in the back, it did much better with omni-directional incandescent bulbs than the wood lantern.

The cells highlighted in red represent likely mis-alignment of the filament and condenser.  Blue highlights are estimates. 

BulbSizeWattsLumenColor TempTypeLanternLUX at Screen
EFP 12V Projection LampGZ6.35 / MR161003350KHalogenWood675
EXN 12V Projection LampGU5.3506802950KHalogenWood330
Feit Electric 200WE26/A2120033052700KIncandesentWood65
Light Efficient Design 25W LEDE26/ A233533504000KLEDWood40
EiKO ECA PhotofloodE26/A2325065003200KIncandesentWood86
PH213 PhotofloodE26/A2125070003400KIncandesentWood60
BBA PhotofloodE26/A2125085003200KIncandesentWood104
Edison/MazdaRound40040003000KIncandesentWood122
Feit Electric 300WE26/A2330058702700KIncandesentWood130
50W 30V COB LEDLED115
100W 30V COB LEDLED230
Kerosene Lantern2 inch X 2KeroseneMcCalister20
Feit Electric 200WE26/A2120033052700KIncandesentMcCalister162*
Light Efficient Design 25W LEDE26/ A233533504000KLEDMcCalister19*
EiKO ECA PhotofloodE26/A2325065003200KIncandesentMcCalister636
PH213 PhotofloodE26/A2125070003400KIncandesentMcCalister70*
BBA PhotofloodE26/A2125085003200KIncandesentMcCalister109*
Edison/MazdaRound40040003000KIncandesentMcCalister460

Summary

I tried multiple types of illumination in two different lanterns. There are a few take aways worth mentioning. 

Take Aways

  • Go Modern - Modern illumination is MUCH brighter than kerosene.  
  • Alignment - It's important that your illumination be in the right location and be roughly the same size as the originally intended illumination.  Bulbs that spread out the light too much will not work well. 
  • Beware of Heat!  - Heat can damage your slides! Pay close attention to how much heat is transferring from your lighting source to your slide holder. 
  • Holding Out Hope For LED's! - Although I was not able to get the same brightness, consistent illumination,  or reliability with LED's as Halogen bulbs, I expect I will be able to get there in time as I work on my heat sink, diffusion,  and power supply issues. 


References


Wednesday, July 8, 2020

The State Theater In Oroville Ca

One of our family members has been heavily involved in helping to restore The State Theater in Oroville California. Built in 1928, the State Theater is one of a series of theaters designed by Timothy Pflueger.

A wall was built down the center of the theater in the 1970's by United Artists to turn it into a dual screen cinema.  As part of the restoration, the wall has been removed to make it a single house again. The row down the middle shows the scar from the old wall.


The theater also originally had circular seating so each seat faced center stage. When it was converted into a dual theater, a new floor was poured and they changed to more typical straight rows.


The large openings above the stage are for the pipe organ.  These had also been covered up and were opened up in 2018.  Although open now,  here's a few photos of that process while in work to show what went into the restoration.

As seen from the front as organ grille was exposed stage right.


Organ grille from the back in the process of being exposed.


You can see the two projection booths up top.


Each projection window has a 35MM projector with the large film platters.


They also have a couple of original carbon arc lamps which is no longer in use.  These would make an amazing lobby display!


The projection booth also has a fire safe for Nitrate film. A true relic from the early days of Cinema!


The balcony is unrestored. 


They just restored the Wurlitzer organ. I chatted with Dave Moreno who is one of the few in the nation who still knows how to support them. We  talked about the history of the one at the El Capitan.  Apparently Disney got it from a politician from LaCanada who got it from a theater that was demolished that he remembered as a kid.   They had a visiting organist who has played consoles at many locations including the one at the Nethercutt Museum. 

The Organ is pieced together from original parts as well as parts of others. The console came from an auto museum in Sacramento and previously was in Orson Wells house. 


They have restored all the pipes and electronics.  I chatted with Dave Moreno about the electronics. There's an ethernet cable that runs from the console up to the D/A converters up top.  It uses proprietary software but can also operate off Midi files. 


Actuator relays for the organ components. 


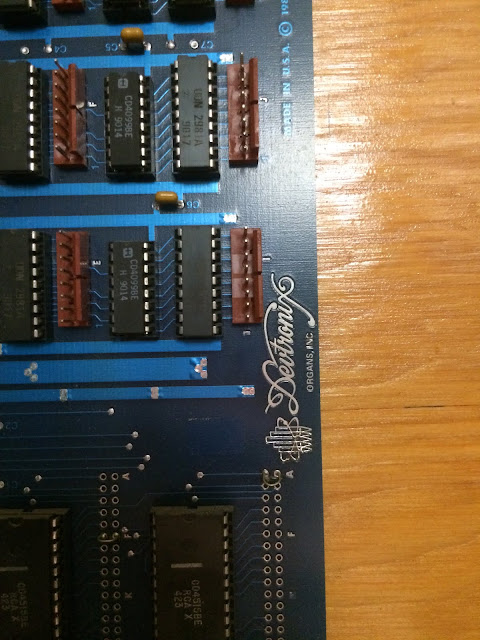
Control board closeup.

The pipes from the organ are truly a site to see! The chairs below the bass pipes give some idea as to their size and scale. 


Pipes behind the grill on stage left. 


Here a couple movies we took while in the stage left pipe chamber.  The amazing Jerry Nagano is at the keyboard!


They are also restoring the 1920's murals and paint. They are slowly removing paint in places to see the original colors and finishes. Notice the railing is about a foot lower than modern railing. 


The restrooms remind us of the wonder of Art Deco!


More behind the scenes, the theater is equipped with dressing rooms for live performances. 

Back stage, much of the original lighting and seating has been preserved as well.  There is Serious work to be done in restoration!


Remember the days of physical marquee lettering?


Some old film reels. 


Hey Look!!  A Biunial Magic Lantern! It would be amazing to see this wonderful piece of cinema history come to life again!   This beauty must have been used to show advertisements and announcements for the audience to see while waiting for the start of a feature film in the 20's and 30's. 


The lenses appear to originally have had shades in front so the projectionist could toggle between two images. 


Interesting casting logo.  I wonder what brand it is.


Continuing the back  room tour, there is significant space above the theater in the attic used for air conditioning duct work. Much of the A/C had to be upgraded to bring the theater up to modern standards.  Not very many people get to see this!


And from top to bottom, a few mysteries of the basement!


Hope you enjoyed this tour and history of the Oroville State Theater!  More information can be found in the following links: