
Lindsay Cox gave me a guided tour. He has been working on updating the space to return it to its 1800’s appearance but also to make it relevant for modern visitors.


Operating as a commercial photography business under the name Salvation Army Studio, the studio produced Cabinet Photos, Paris Panels, and Carte De Visite photographs for customers including Salvation Army members and the general public. It also created Magic Lantern shows and film content for the Salvation Army . Many narrative slide sets were produced at the studio as well as cinema sequences.


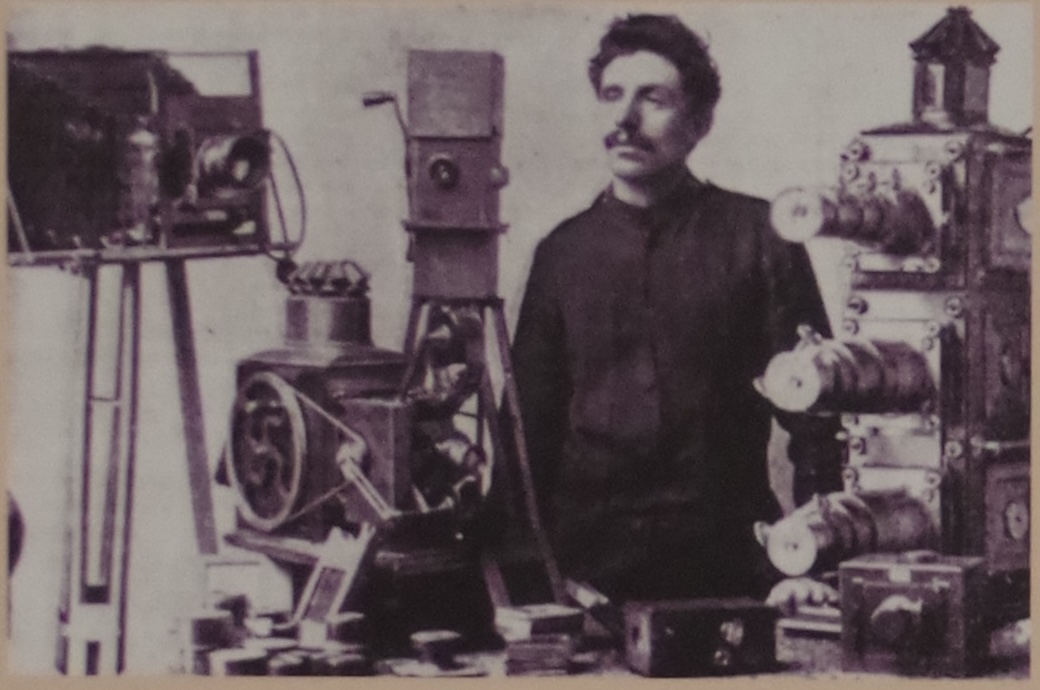
Salvation Army Captain Joseph Perry got his start as a film technician and publicist in 1890 at Ballarat Australia where he established a photographic and lantern slide studio. Perry’s work with the Salvation Army involved managing a home focused on the rehabilitation of released inmates from the Ballarat Jail. His lantern shows allowed him to promote his work as well as raise funds for upkeep of the facility.
Major Frank Barrett - 1891
Perry’s talents soon caught the eye of his superior Major Frank Barrett. Barrett had established the Salvation Army Studio in Melbourne at 69 Burke St. and brought Perry to Melbourne to become the chief technician and producer of the content at the studio. They produced Lantern shows and performed them for the public.
A display of slides created at the facility.
Operating as a commercial photography business under the name Salvation Army Studio, the studio produced Cabinet Photos, Paris Panels, and Carte De Visite photographs for customers including Salvation Army members and the general public. It also created Magic Lantern shows and film content for the Salvation Army . Many narrative slide sets were produced at the studio as well as cinema sequences.
Some history of the Limelight Studio
Captain Joseph Perry - 1890 - 1891Salvation Army Captain Joseph Perry got his start as a film technician and publicist in 1890 at Ballarat Australia where he established a photographic and lantern slide studio. Perry’s work with the Salvation Army involved managing a home focused on the rehabilitation of released inmates from the Ballarat Jail. His lantern shows allowed him to promote his work as well as raise funds for upkeep of the facility.
Major Frank Barrett - 1891
Perry’s talents soon caught the eye of his superior Major Frank Barrett. Barrett had established the Salvation Army Studio in Melbourne at 69 Burke St. and brought Perry to Melbourne to become the chief technician and producer of the content at the studio. They produced Lantern shows and performed them for the public.
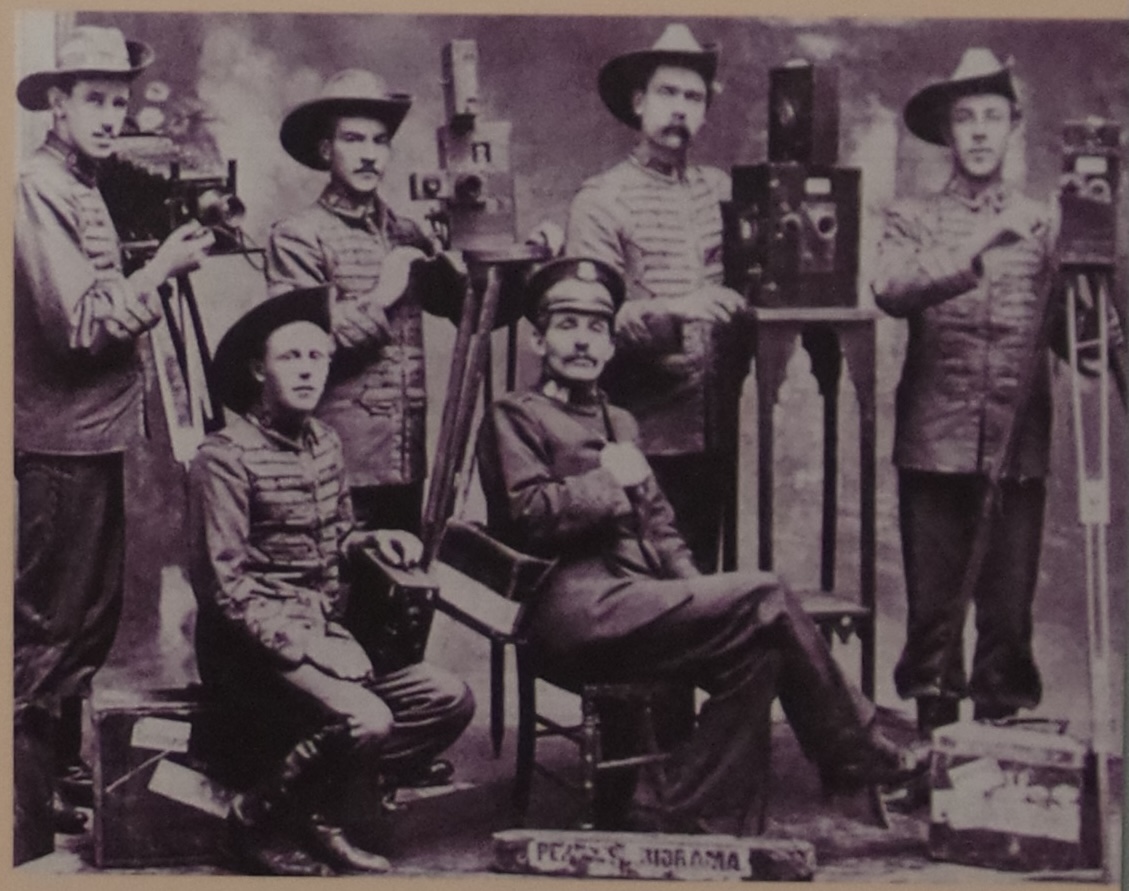
Perry was a skilled showman, and Commissioner Coombs started the "Limelight Brigade". Perry was able to travel extensively through Australia and New Zealand giving Lantern lectures promoting the Salvation Army. In the first three years he gave over 500 illustrated lectures and covered over 30,000 miles in the first three years.
The Attic Limelight Studio - 1894
The attic studio was added in 1894 by raising the roof and adding south facing sky-lights. (Studios in the northern hemisphere usually use north facing skylights as this allows avoiding direct sun and harsh shadows. Southern hemisphere is the opposite.). This acted as the Limelight Brigade’s new headquarters and photographic facility and was operated by Captain Joseph Perry. The current museum is contained within this original studio.

You can still see the text above the door for the original coloring studio.


South facing skylights for natural light.

Herbert and Corelie Booth - 1896
The lantern slide and photographic studio had been going for 5 years when, in 1896, new leadership was brought into Australia and Asia. Herbert and Corelie Booth decided to enlarge it, rename it as the Limelight Department. The Salvation Army Studio became colloquially known as ‘The Limelight Studio’ because of its association with Perry and the Limelight Department. They acquired a Lumière Cinématographe, a novel device which was both a portable camera and a projector as well as three Kinematographs. This greatly enhanced the abilities of the department. They continued to add photographic equipment including film projectors, photographic cameras, and Biunial and Triunial Magic Lantern projectors.
The First Film Studio - 1898
It was quickly understood that film was a powerful way to deliver a message and focus was put on producing films for the public.
Soldiers Of the Cross - 1900
Perry, and Booth collaborated on the multimedia spectacle “Soldiers Of The Cross”. This was a two and a half hour epic which consisted of fifteen, 90 second film clips and contained over 200 hand colored Lantern Slides. Herbert Booth delivered the script in person and music was provided by a brass band and choir. The content of the film was meant to raise emotion. It focused on martyrs of the Christian Faith under emperor Nero and contained graphic images of Christians being burned at the stake, eaten by lions, or being hacked to death and thrown into pits of burning lime. Not for the faint of heart!

Booth later left the Salvation Army but continued to perform the film. Unfortunately, no copies of the film are known to exist and we now only have the Lantern slides.
Birth of The Australian Nation - 1901
On January 1st, 1901, the Commonwealth of Australia was formed as a federation of former British colonies. The Salvation Army Studio was there to film the event with their motion picture cameras and produced what is likely the world's first documentary. 1901 also saw the Limelight studio become Australia's first registered film company - The Australasian Kinematographic Company.
End Of The Limelight Studio -1909
The limelight studio continued to grow and resulted in an explosion of content creation. Their greatest achievements were between 1901 and 1905 and during this time produced nearly 80% of all Australian made films.


However, in 1909 new commissioner, James Hay assumed command of the Australian territory for the Salvation Army. He felt that filmmaking was not aligned with the mission of the Salvation Army and shut them down.
"It should be noted that the cinema, as conducted by the Army, has led to a weakness and lightness incompatible with true Salvationism, and was completely ended by me". - James Hay, September 1909.
The Archives
Lindsay gave me a "behind the scenes" tour of the archives for the Salvation Army in Melbourne which also includes archives for the Limelight studio. They had a great collection of vintage media, printed matter, and Magic Lantern slides.
Here's an original ticket for a multimedia movie and lantern show at the facility from between 1898 and 1901. Price for a show awas one shilling. (1s/0d)


We also toured the period performance hall within the building.

If you find yourself in Melbourne Australia, I suggest a visit to the Limelight studio. It's a great chance to see one of the early locations from the birth of Cinema history.
The Salvation Army Australia Museum
Level 4
69 Bourke St.
Melbourne, Australia
Open 9AM -3PM Monday-Friday
Tel: 03-9653-3270
Email: lindsay.cox@salvationarmy.org.au
https://en.wikipedia.org/wiki/Carte_de_visite
https://en.wikipedia.org/wiki/Joseph_Perry_(cinematographer)
https://en.wikipedia.org/wiki/Joseph_Perry_(cinematographer)


